Managing Taxes
It's no secret that managing taxes is a crucial component that requires precision and attention to detail.
Let's explore the process of handling taxes within your website's admin area, ensuring compliance and accurate financial transactions.
|
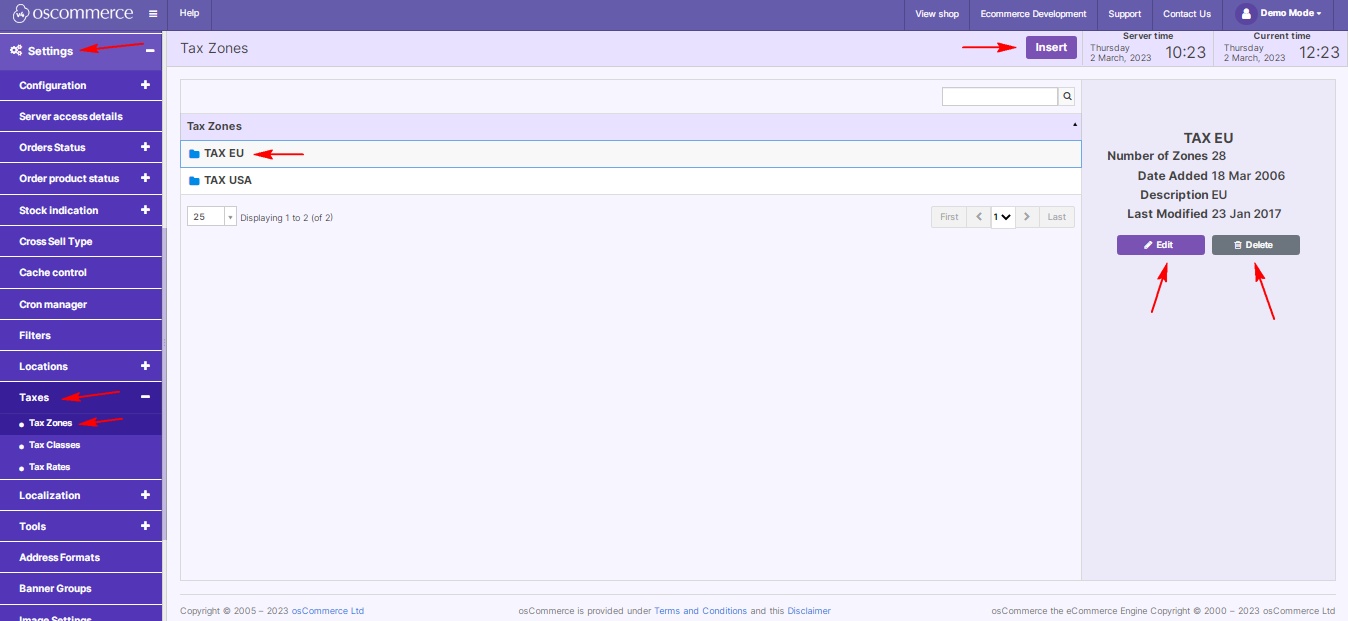
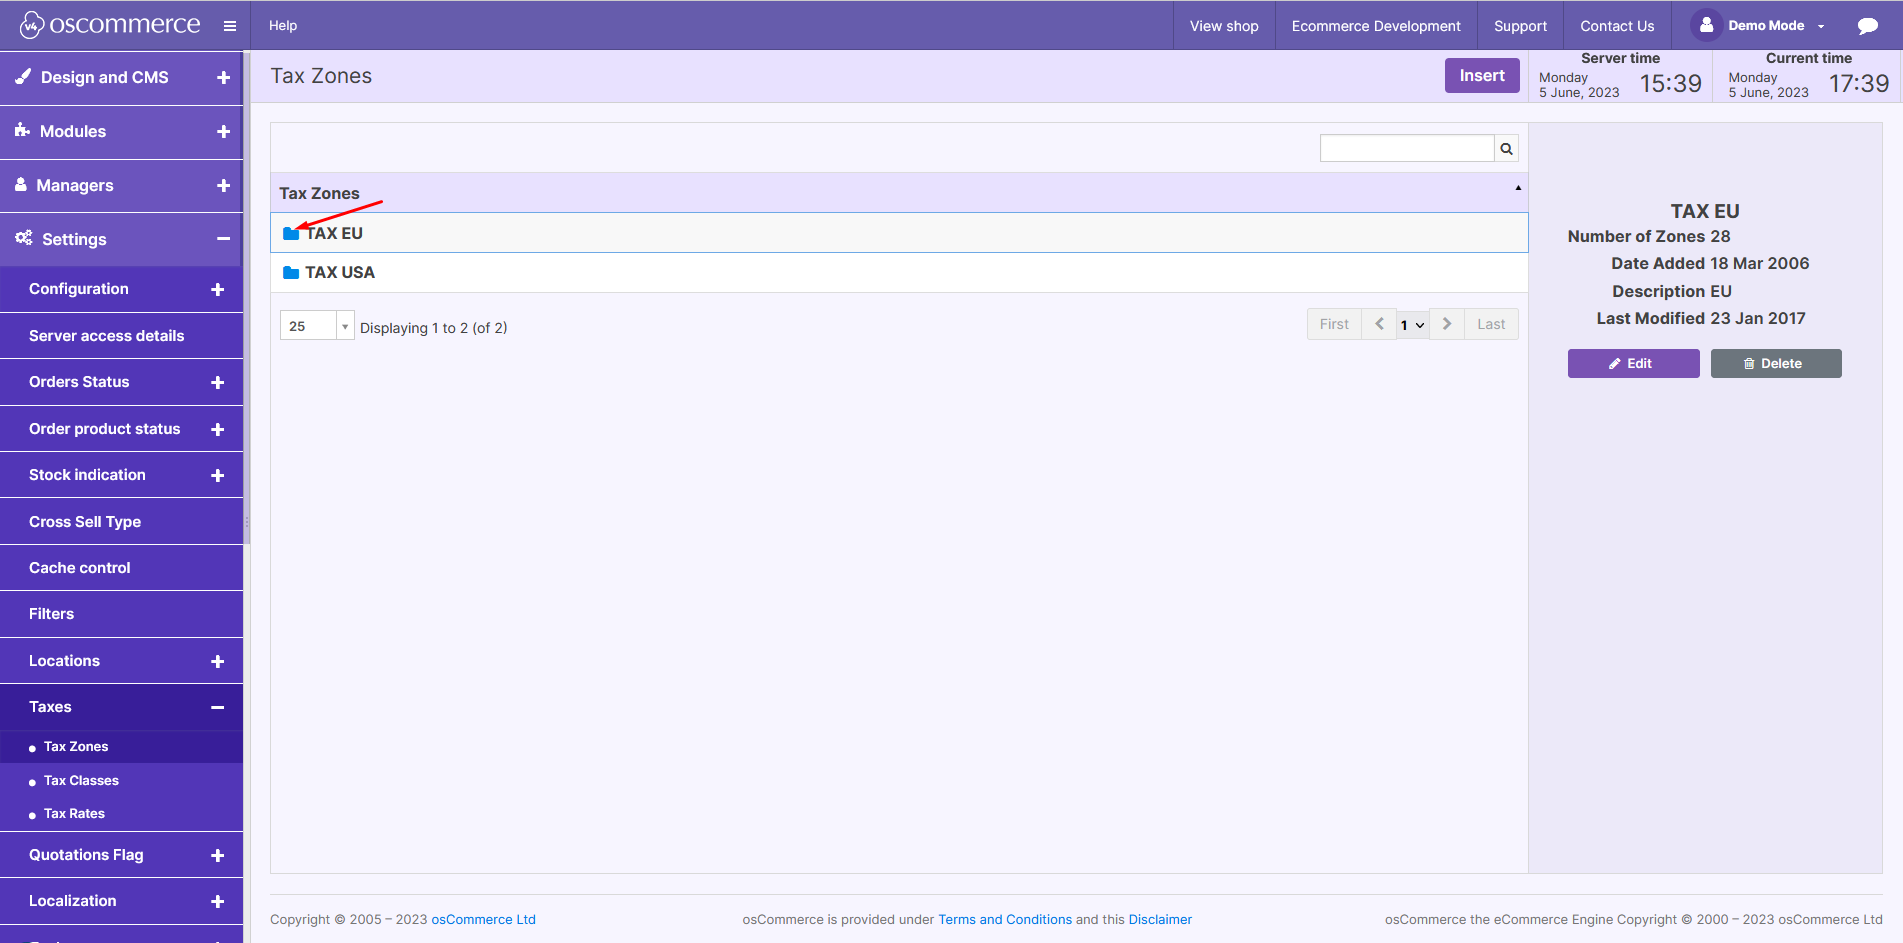
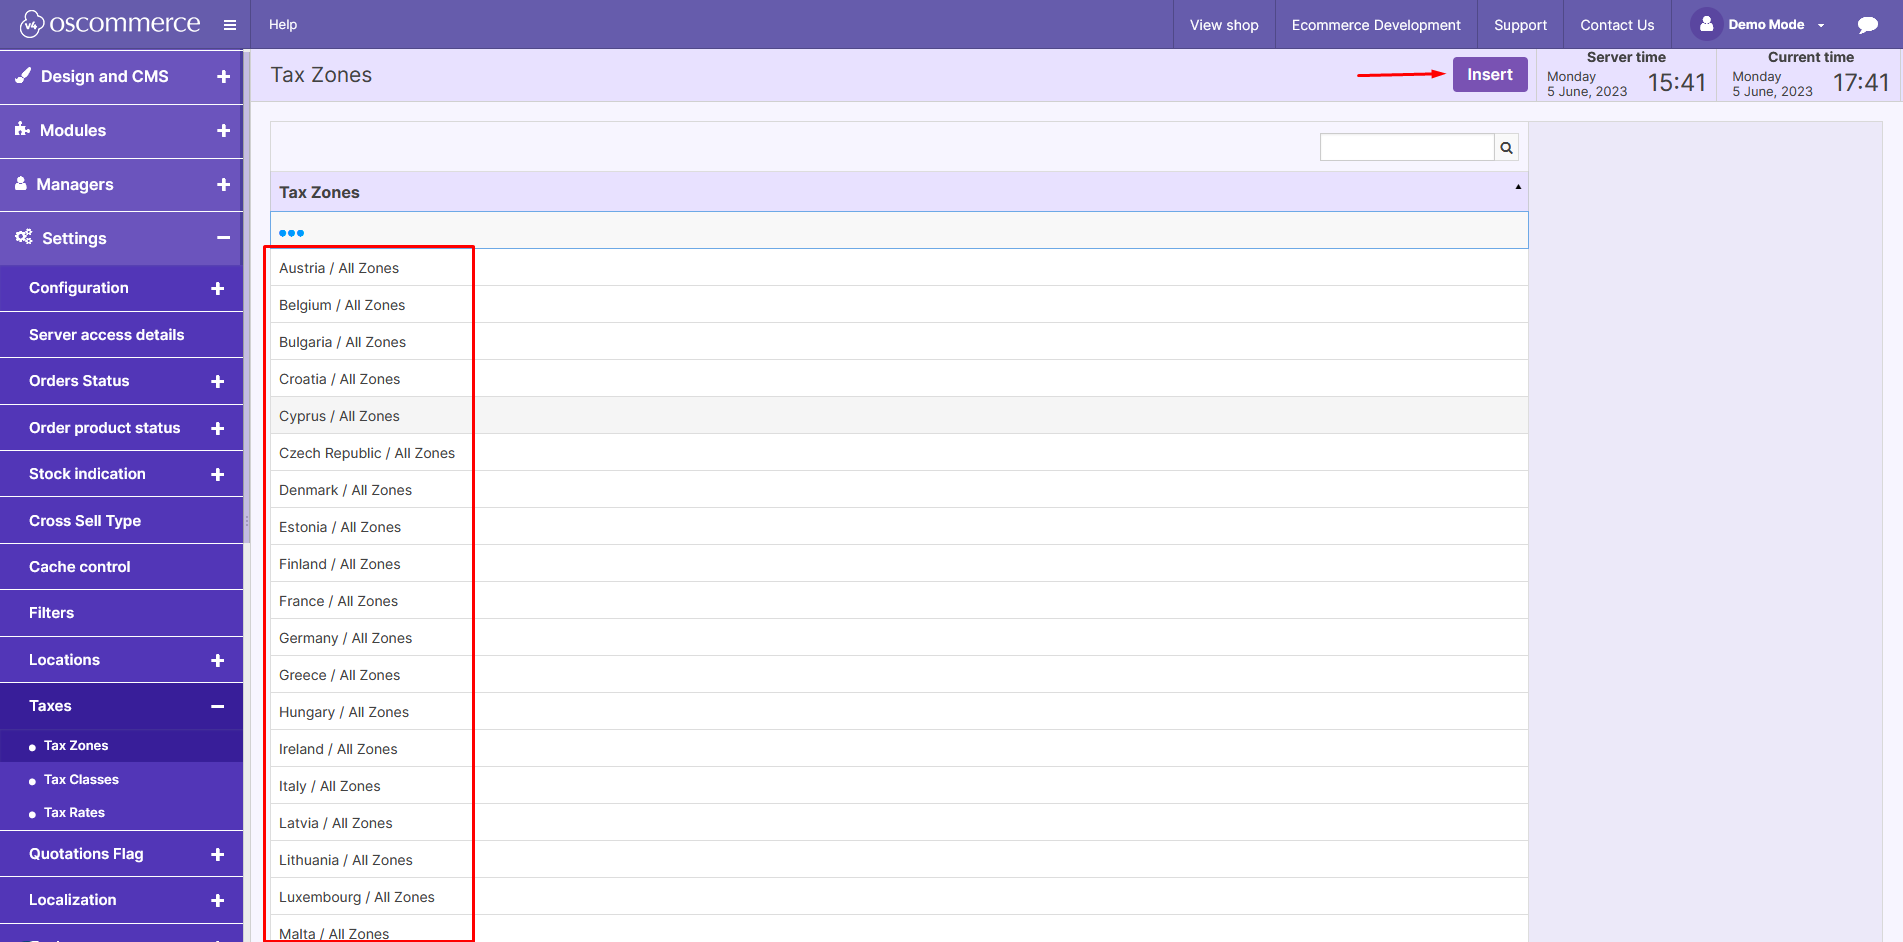
Step 1: Access the Admin Area Commence your tax management journey by logging into your website's admin area. Here, you can fine-tune various settings to enhance your online store's functionality. Step 2: Navigate to Taxes Inside the admin area, click on the "Settings," "Taxes," and "Tax Zones" tabs. Here, you'll encounter a comprehensive view of existing tax zones, providing a foundation for your tax management tasks. Step 3: Manage Tax Zones Dive into tax zones by selecting the desired one. You can effortlessly edit or delete existing zones, maintaining accuracy in your tax structure. To expand your tax setup, insert a new tax zone using the corresponding button. |
 |
|
|
Customizing Tax Zones: When inserting or editing a tax zone, populate the required fields to tailor it to your specific needs. |
|
Additionally, explore folders and insert relevant countries for each tax zone, ensuring precise taxation across different regions. |
|
|
|
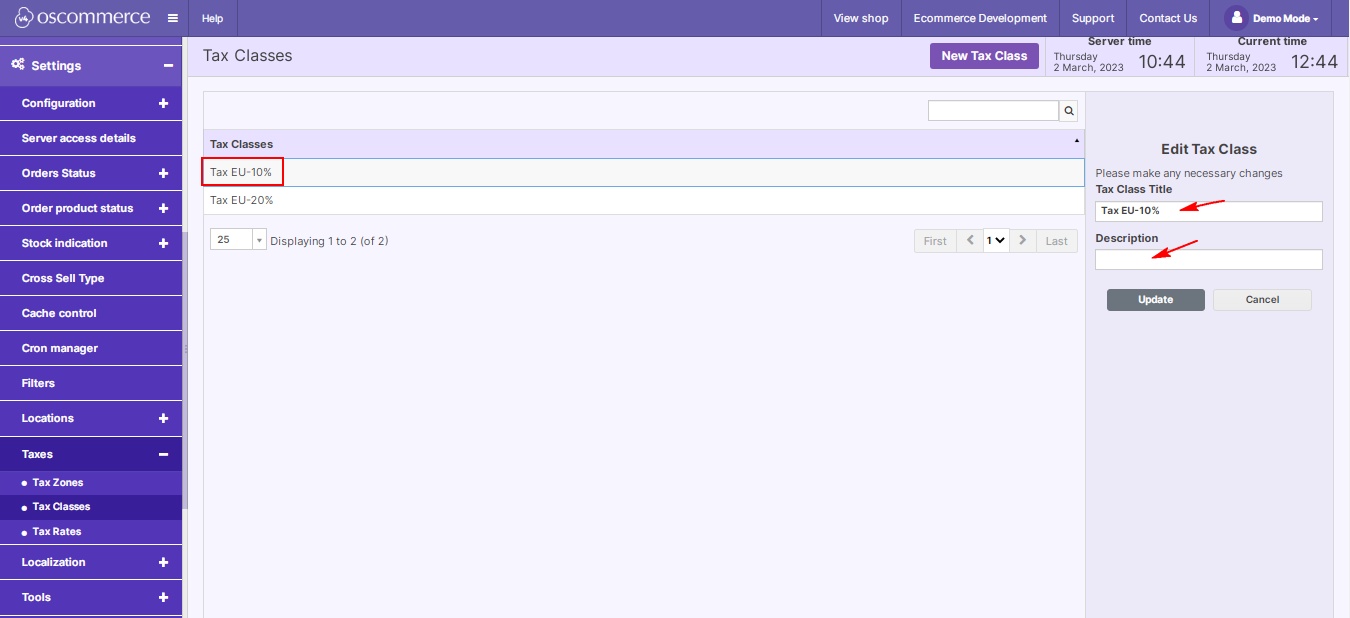
Step 4: Explore Tax Classes Navigate to the "Tax Classes" tab. Here, you can observe existing tax classes, edit or delete as needed, or introduce a new tax class with the "New Tax Class" button. |
|
Customize tax classes by inserting or updating the necessary fields to align with your business model. |
|
|
|
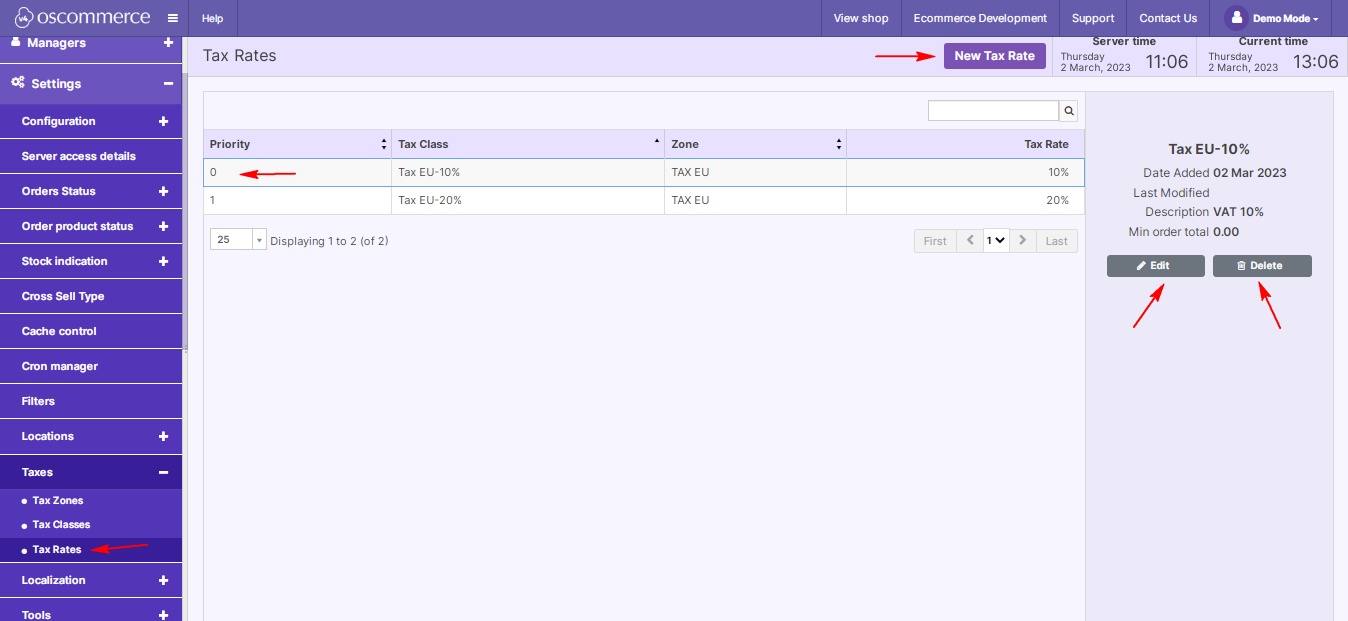
Step 5: Dive into Tax Rates Continue your tax management odyssey by clicking on the "Tax Rates" tab. Explore existing tax rates, edit or delete where required, or add new rates with the "New Tax Rate" button. |
|
Similar to tax zones and classes, tailor tax rates by inserting or updating the necessary fields. |
|
Navigate these tax settings with confidence, and elevate your e-commerce venture to new heights. Happy managing!


.png)

