Managing Status Groups
Efficient order management is the heartbeat of any successful e-commerce venture. Status groups play a pivotal role, streamlining the chaos of various order statuses into a cohesive system. In this blog post, we'll explore how to effectively manage status groups in your website's admin area, ensuring a seamless workflow and enhancing customer satisfaction.
|
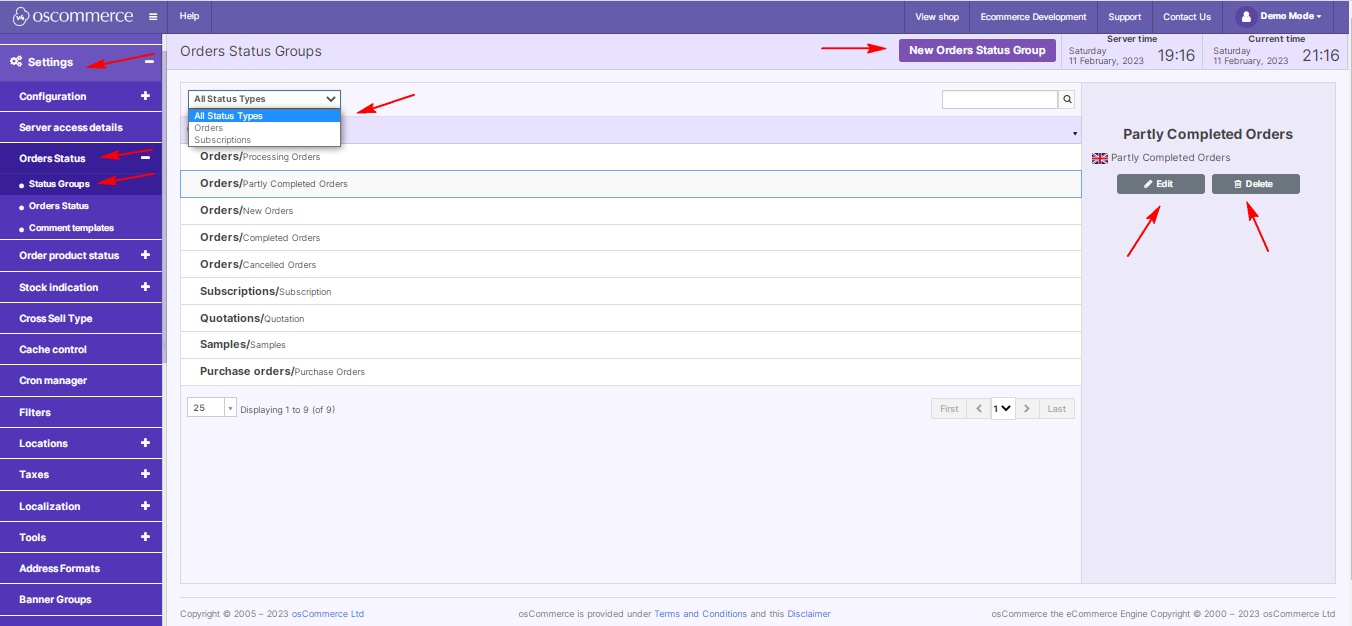
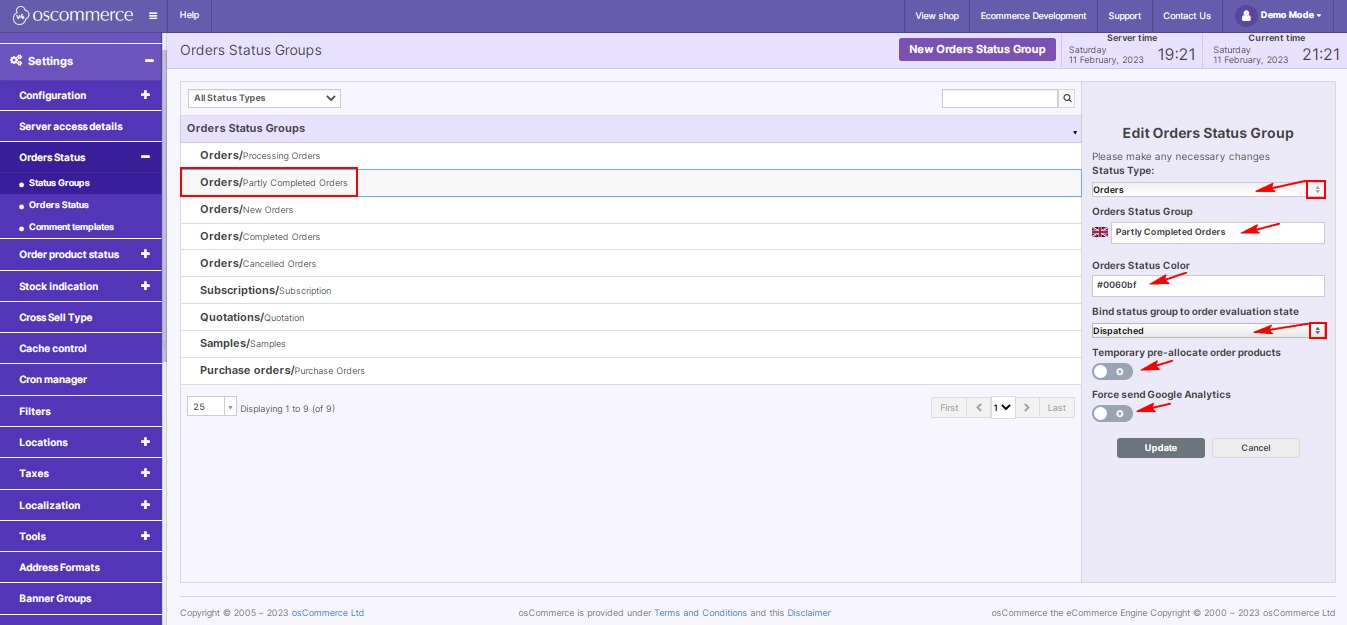
Step 1: Accessing the Admin Area Begin by logging into your website's admin area. This is your command center for enhancing your store's functionality. Step 2: Navigating to Status Groups Once logged in, head to the "Settings," then navigate to "Orders Status," and finally, click on "Status Groups" tabs. Here, the intricate world of order statuses unfolds. Step 3: Filtering Status Groups Utilize the dropdown menu to filter status groups based on their type, whether it's related to orders or subscriptions. Step 4: Managing Status Groups With simple clicks, you can add new status groups, edit existing ones, or remove outdated ones, ensuring your order management aligns with your business needs. |
 |
|
|
Step 5: Customizing Status Groups While adding or editing a status group, you have a plethora of customization options at your fingertips:
|
Managing status groups isn't just about organizing orders; it's about streamlining your entire business process. By following these steps, you ensure that your order management system is not just efficient but also finely tuned to your unique business requirements. Happy managing!


