Managing Sales Tags
Effective organization is one of the tools for online sales success. In this blog post, we'll guide you through the straightforward process of managing sales tags.
|
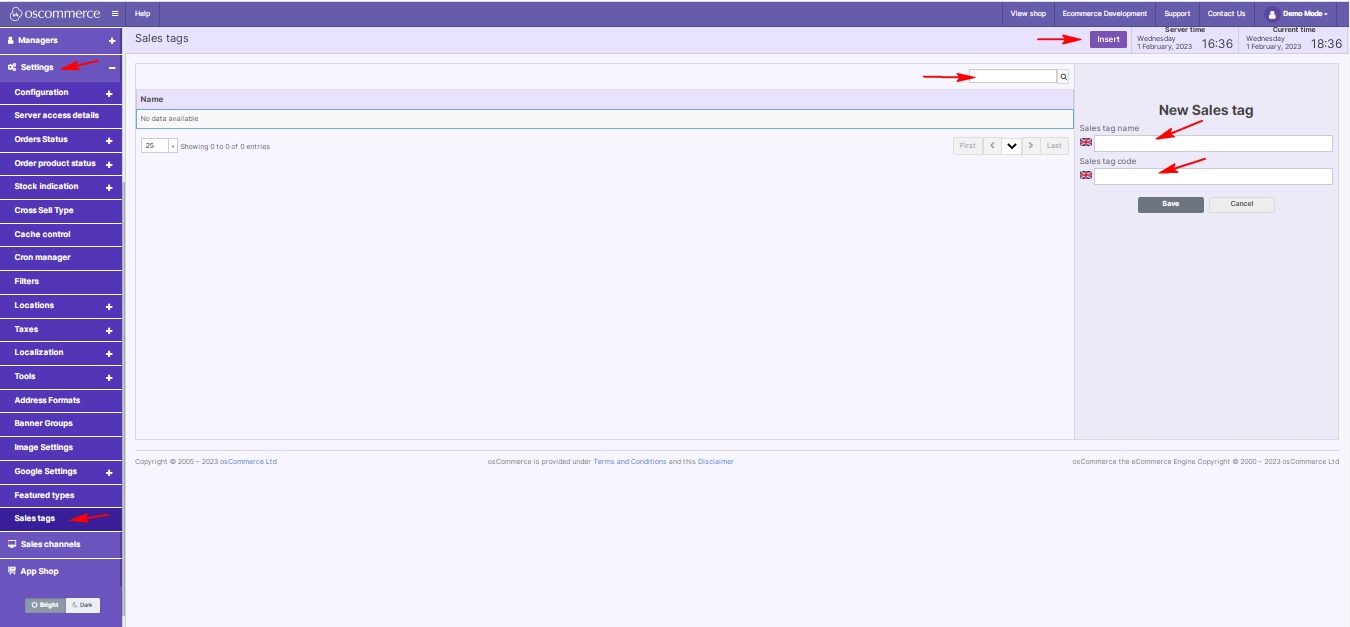
Step 1: Access the Admin Area Begin by logging into your website's admin area, your central control hub for configuring various settings to optimize your sales process. Step 2: Navigate to Sales Tags Within the admin area, locate the "Settings" tab and click on "Sales Tags." Here, you'll find the tools to seamlessly manage and organize sales tags. Step 3: Set Sales Tag Details Click on the "Insert" button to effortlessly add a new sales tag. Enter the sales tag name and code in the corresponding fields. This quick and straightforward process enhances your ability to categorize and label products effectively. Step 4: Utilize Quick Search Leverage the Quick search feature to swiftly locate specific sales tags by name. This time-saving feature ensures efficient management, especially when dealing with a diverse range of products and tags. |
 |
Optimizing your sales organization with well-defined tags is crucial for easy navigation and enhanced customer experience. By following these simple steps, you'll streamline your sales process and contribute to the overall success of your online business.


