Managing Image Settings
In today's visual-centric online landscape, managing how your website handles images is crucial for an engaging user experience. In this blog post, we'll guide you through the process of fine-tuning your image settings for optimal display.
|
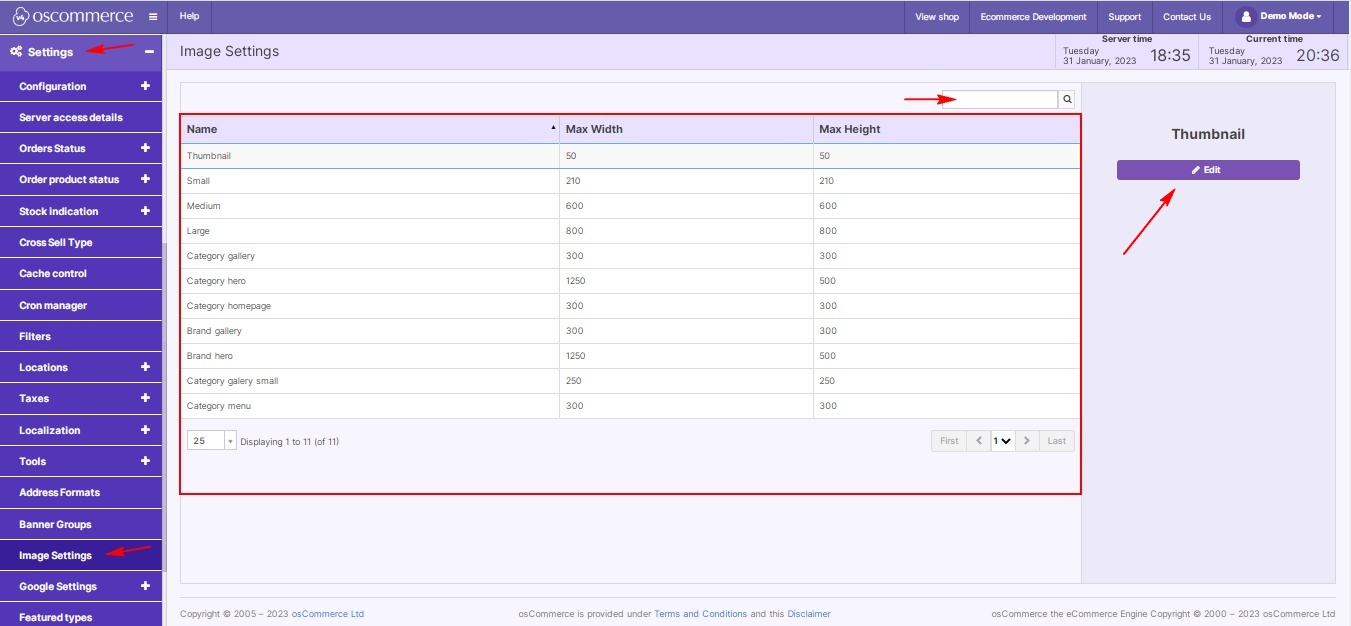
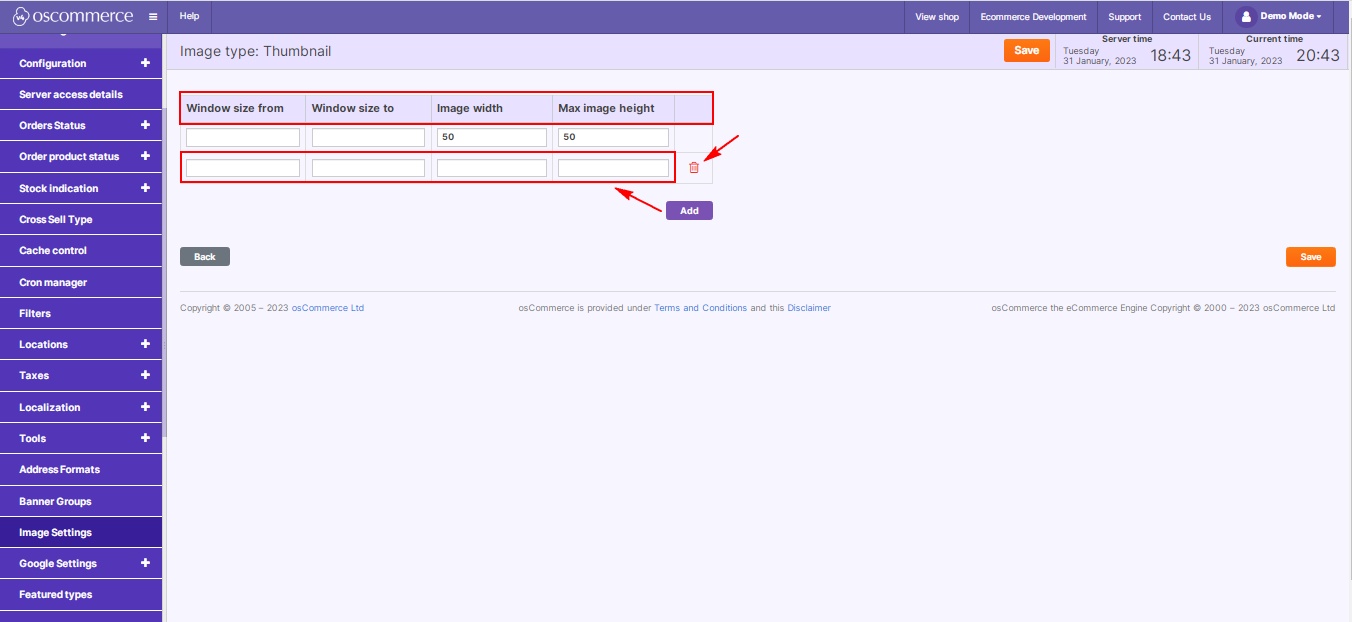
Step 1: Access the Admin Area Begin by logging into your website's admin area. This is your control center for configuring various aspects of your site. Step 2: Navigate to Image Settings Inside the admin area, locate the "Settings" tab and click on "Image Settings." Here, you'll find a range of options to tailor how your images appear on your website. Step 3: Configure Image Display Parameters Click on the "Edit" button to delve into the customization options. Adjust the following parameters for different image types:
Step 4: Streamline with Quick Search Efficiently locate specific settings using the Quick search feature. Simply enter the name, and the system will narrow down the options for you. |
 |
|
|
Step 5: Add or Remove Parameters Tailor your image settings further by adding or removing parameters. Click on the "Add" button to introduce a new parameter row, and use the trash can icon to delete unnecessary ones. |
By optimizing your image settings, you ensure that visuals on your website are not only aesthetically pleasing but also load efficiently, providing a seamless and enjoyable experience for your visitors. Happy configuring!


