Managing Expected Products Report
Efficiently managing your expected products is very important for streamlined business operations. In this blog post, we'll explore the ins and outs of the Expected Products Report module, guiding you through the steps to install, access, filter, customize, and export reports for a seamless experience.
|
 |
 |
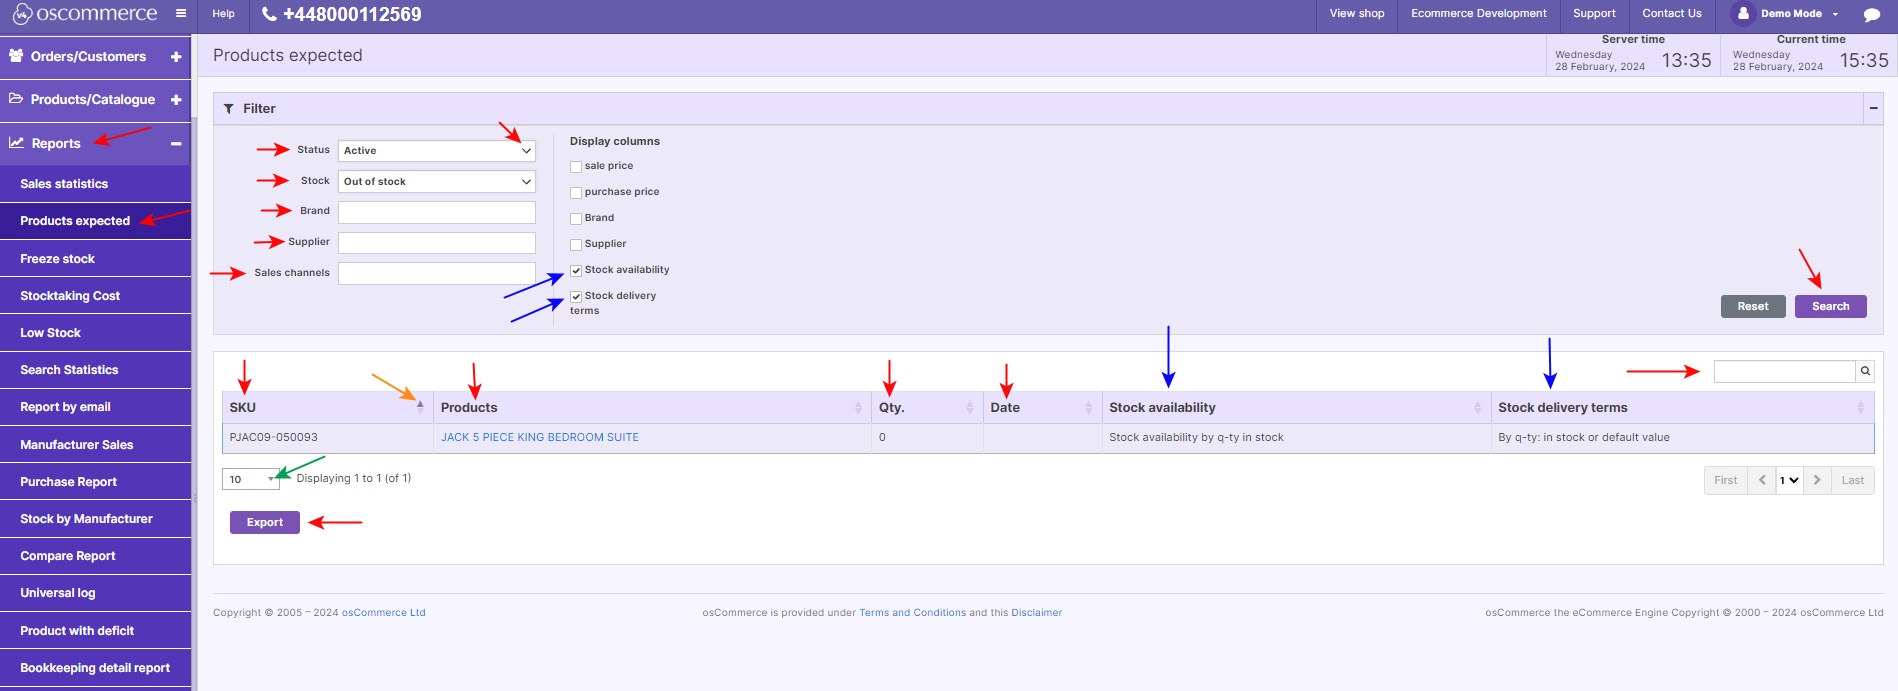
2. Navigating the Module: After installation, explore the module by navigating to the Reports and Products expected tabs. Utilizing Filters: Under the Products expected tab, utilize filters such as Status, Stock, Brand, Supplier, and Sales channels. Select options from drop-down lists to precisely refine your data search. Customizing Columns: The default table includes essential columns like SKU, Products, Quantity, and Date. Customize your report by selecting additional columns like Sale price, Purchase price, Brand, and more. Sorting and Searching: Easily sort data columns with up and down triangle icons. Utilize the search option to quickly find products by name. Exporting Reports: To export reports, simply click the Export button, ensuring easy data sharing and analysis. Managing Display: Set the display quantity per page for convenient management of records. |
Effortlessly stay on top of your expected products with the Expected Products Report module. Explore the functionalities, enhance your reporting capabilities, and optimize your business processes.
Thanks for reading and stay tuned for more insightful guides to empower your online management experience.


