Managing Countries
Navigating the global landscape of your online store involves effective management of countries. In this blog post, we'll guide you through the essential steps to manage countries seamlessly within your website's admin area.
|
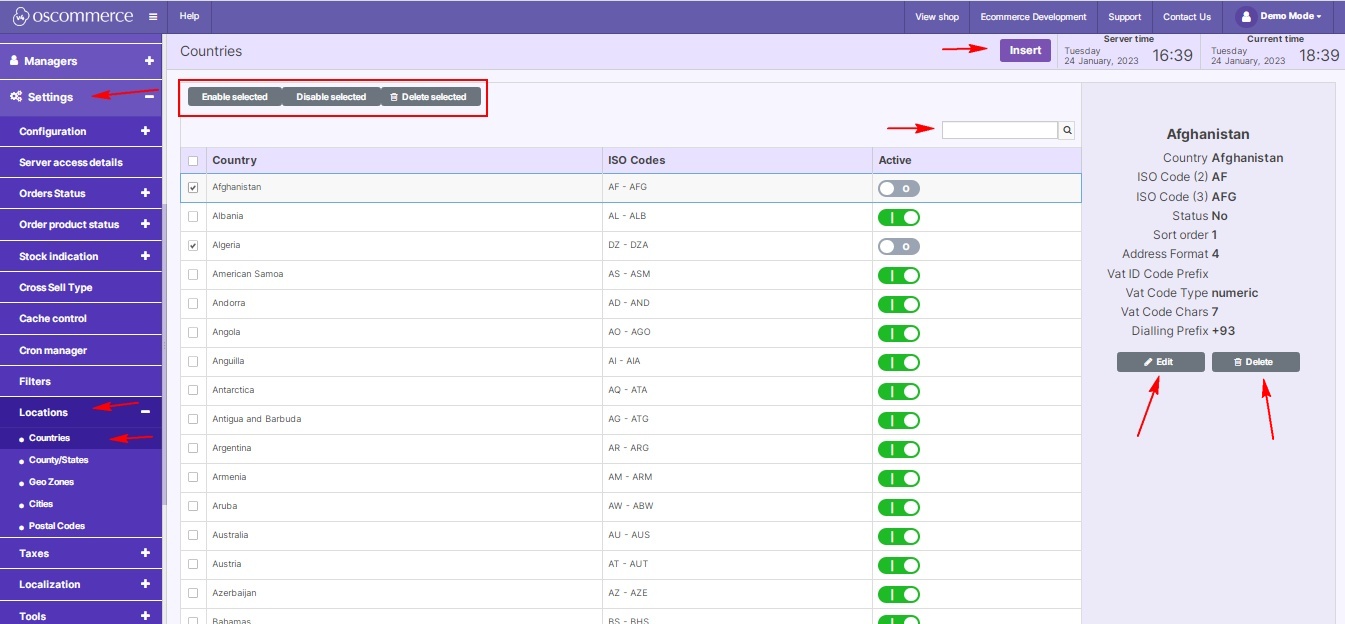
Step 1: Begin by logging into your website's admin area. This is your control center for managing various settings related to your online store. Step 2: Inside the admin area, locate and click on the "Settings," "Locations," and "Countries" tabs. These sections provide a range of options to efficiently handle country settings. Step 3: Work with Country Settings. Under the "Countries" tab, you have multiple options such as Edit, Delete, and Insert a new country. The Quick search feature is available for a swift search of countries by name. Step 4: While selecting countries on the listing page, you can Enable or Disable selected countries or choose to Delete selected ones. |
 |
|
|
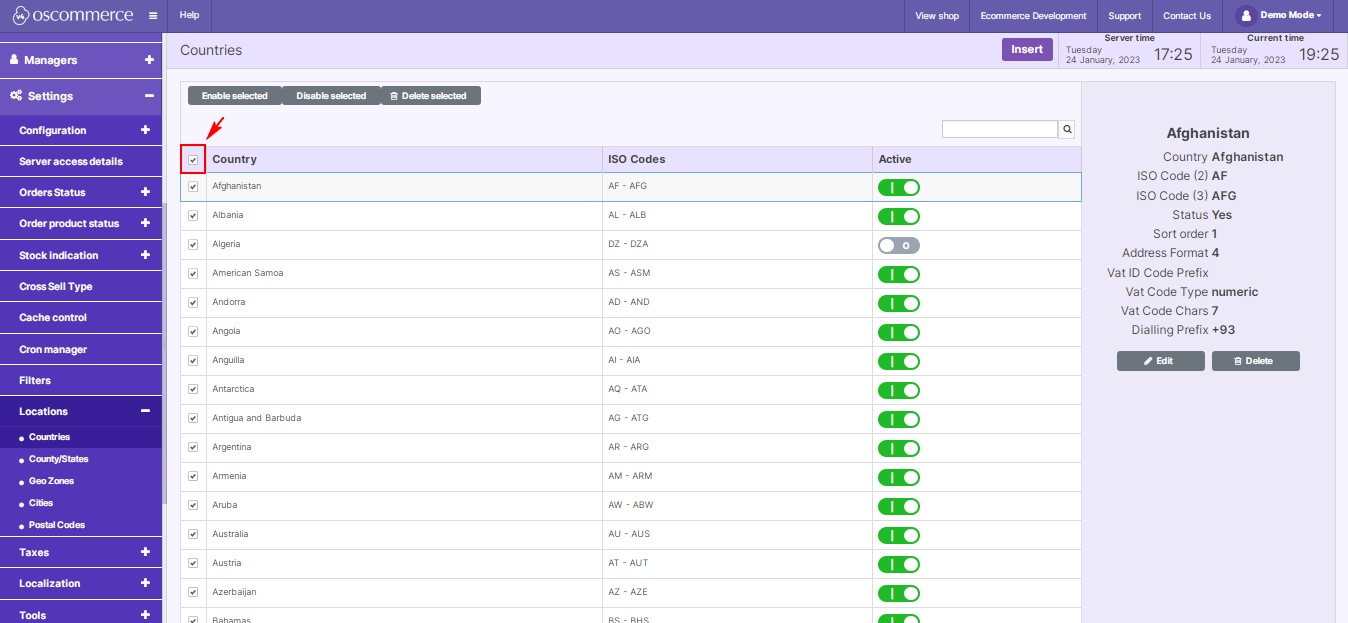
Utilize the checkbox on the topmost row to the left of the “Country” column to select all countries automatically, or manually check the required ones. |
|
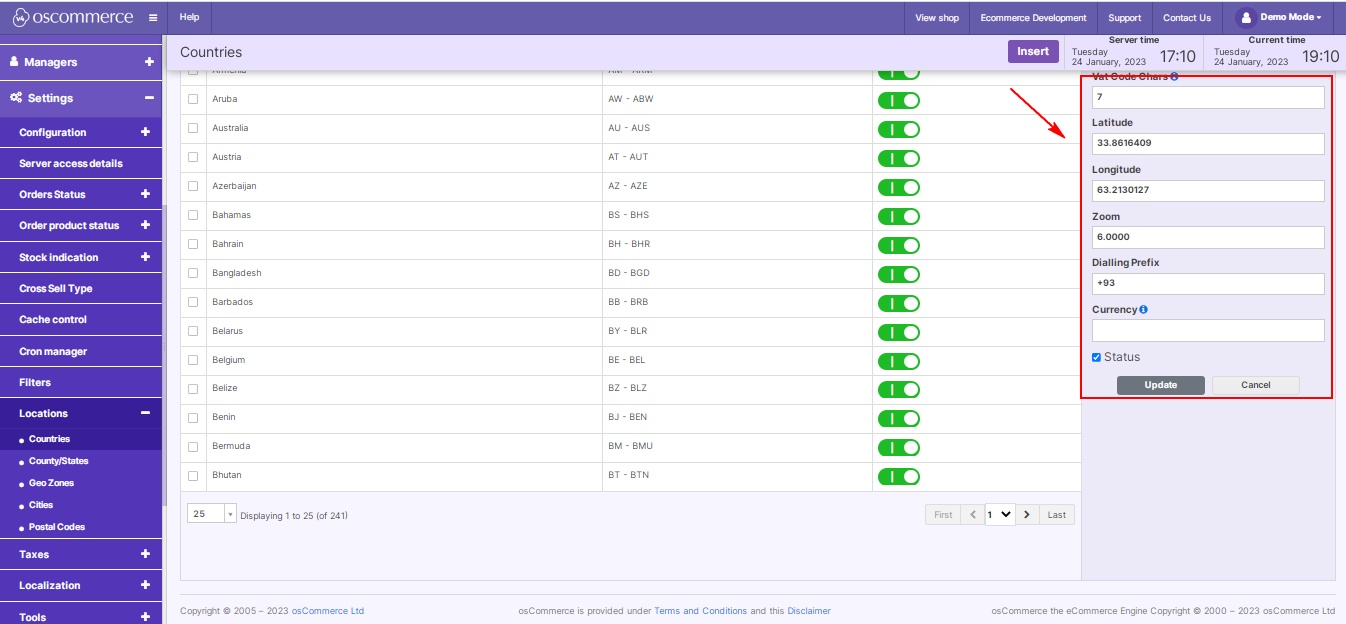
Step 5: Click on the Insert or Edit button to set specific parameters for each country. Customize details such as country name, ISO codes, address format, sort order, VAT code details, map coordinates, dialing prefix, currency, and enable or disable a country as needed. |
|
Effectively managing countries is crucial for the smooth functioning of your online store. With the tools provided in the admin area, you can tailor country settings to align with your business requirements. Happy managing!


