Managing Menus
Managing your website's menus effectively is crucial for providing seamless navigation to your visitors. In this guide, we'll walk you through the steps of mastering menu management in your website's admin area. With easy-to-follow instructions, you'll be able to create, edit, and organize menus effortlessly, ensuring an optimal user experience.
Navigating through your website's backend can be a breeze if you know your way around the menus. Here's a step-by-step guide to help you manage your site's menus effectively:
|
Accessing the Menus:
Creating a New Menu:
Menu Customization:
|
|
|
|
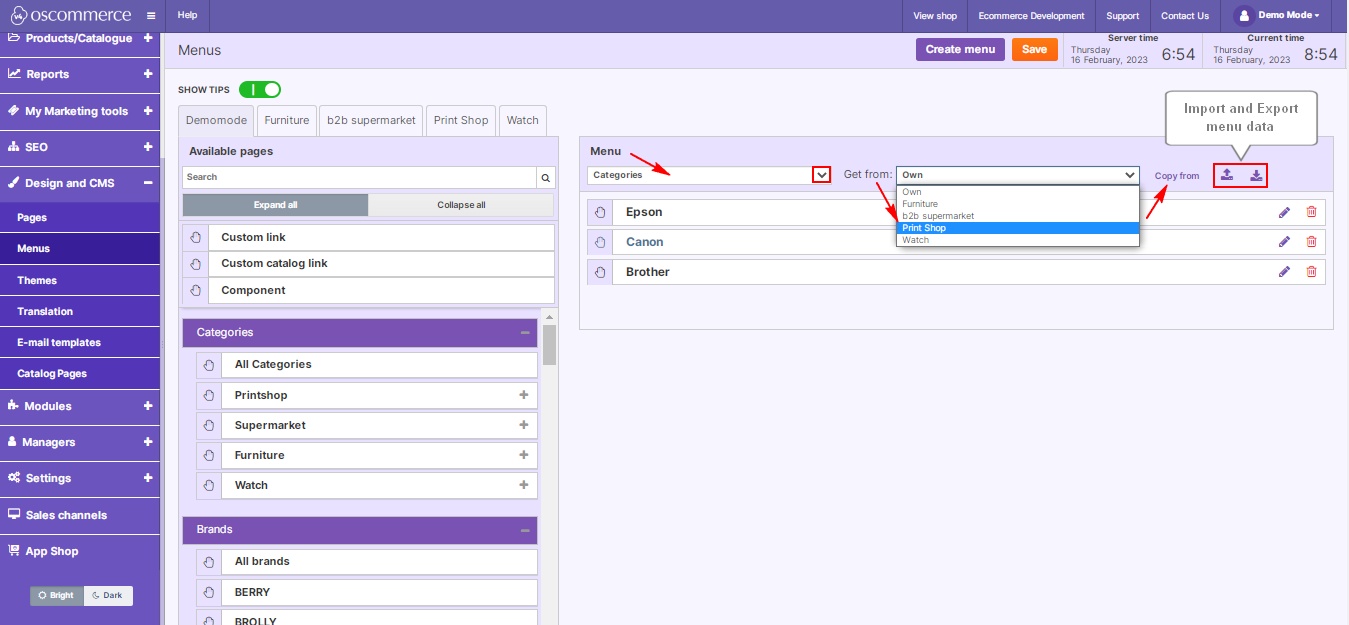
2. Utilize various functions, such as choosing menus from the dropdown, copying menus from other channels, and importing/exporting menu data. |
|
Editing Menu Items:
|
|
|
|
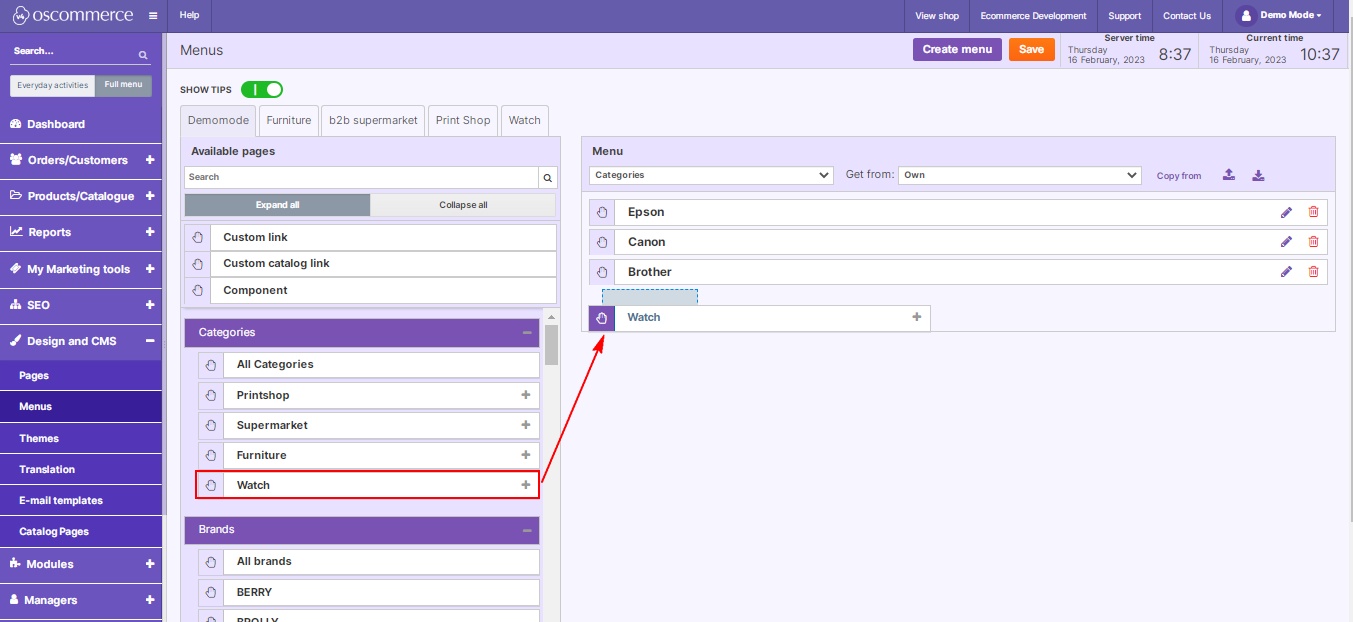
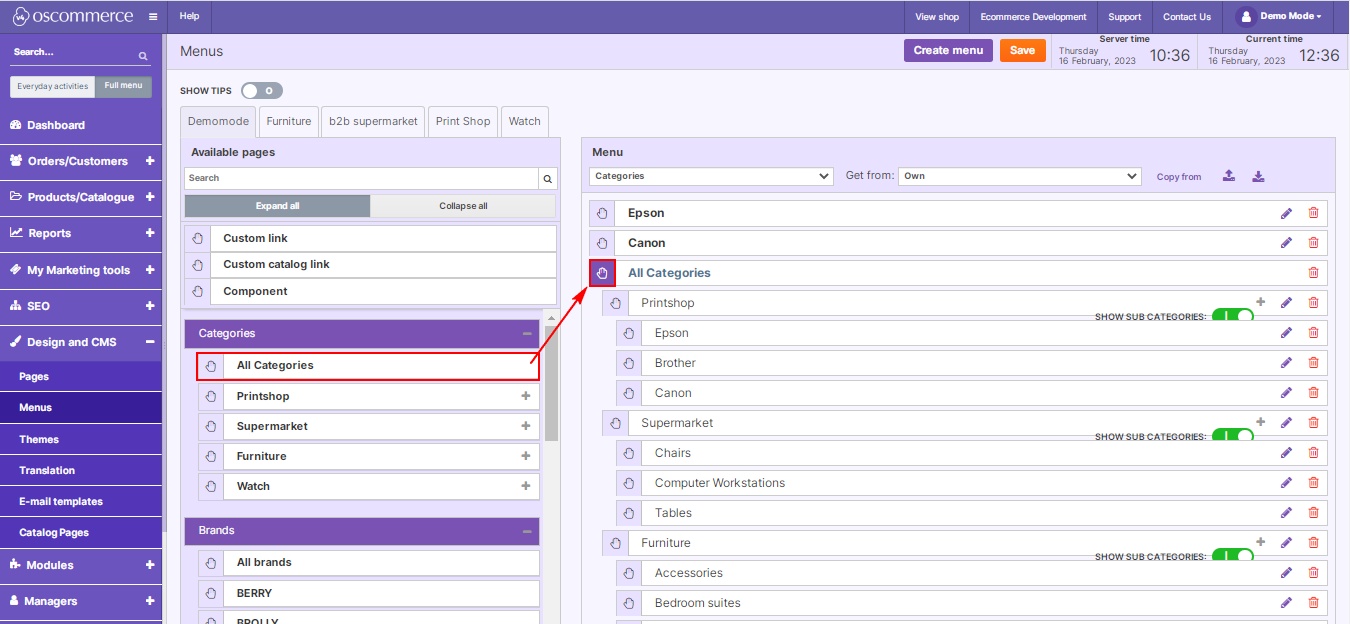
2. Add single or all categories/brands as menu items, ensuring they stay automatically updated. |
|
3. Select Default, Info and Account pages by clicking on + icon and then choosing the required page. Add Components (from the list of existing components), Custom link and Custom catalog links by dragging them using the hand tool. |
 |
|
|
4. Modify menu item titles, set flag to open in new tabs, set “Nofollow link” for SEO, apply CSS classes. For custom links, set the appropriate URLs.
|
Mastering menu management is essential for creating a user-friendly website. By following these steps, you can effortlessly organize your menus, enhancing navigation for your visitors. Happy managing!


